
Every day, people upload 1.8 billion photos to the internet. With most phones and devices today having a camera, it’s easier than ever to share and save snapshots of our daily lives. Your pictures can be saved to any online file storage for safe keeping. But many people want to share them with family, friends or even strangers with similar interests.
If you are an aspiring photographer, you should probably save your photos in three separate locations for safe keeping. But for general photo saving use, one online service will probably do just fine. Most online photo storage/sharing sites offer the ability to edit photos.
There are many online photo management services. Here we will show you a few popular choices.
Google Photos
Google Photos is available with your Google account. You can automatically search for faces, places, and things without tagging. It helps you sort organize and manage all of your images. You would probably only find this app useful if you have a smart phone, iPod or iPad.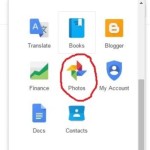
- You download the app from your phone; sync it with the photos on your phone. It will take a few minutes to transfer your files the first time.
- Then, go to a computer, open up your Google account and all of your photos will be there.
- From there, you can select the Photos icon in the top bar of your Google account.
You can create albums manually but Google Photos will create some for you automatically. The coolest part is that you can search for what’s in the photo even if you haven’t labelled or tagged it.
How to use Google Photos:
Flickr
Flickr is another online photo album service. However, Flickr has some unique features that make it a good resource when you are doing school projects or blogging. In this activity, we will practice using a picture from the internet in a blog post.
- Go to http://www.flicker.com
- On the homepage in the top right, you should see a search bar. Type a word into the search box. Use a word that helps describe your goals at the Adult Learning Centre, such as “achievement,” or “learning.”
- Click search.
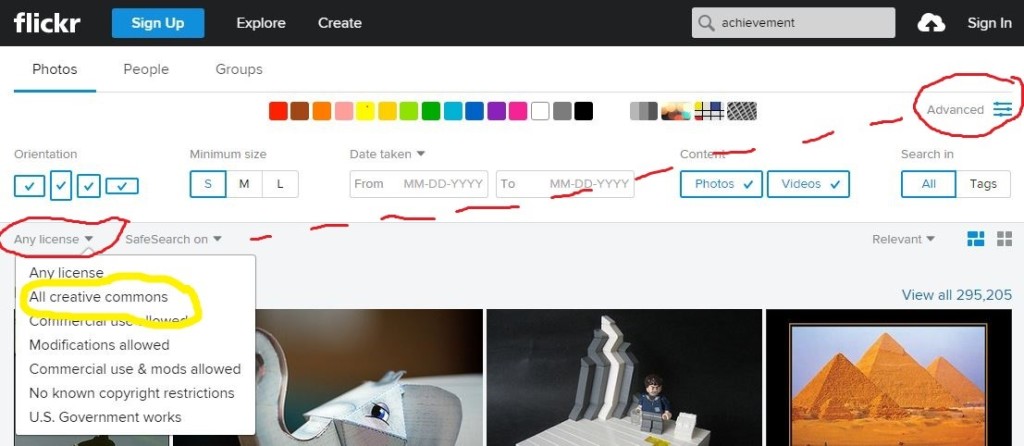
- Near the top of the results page, under the search bar, click on “Advanced.”
- A new menu appears. On the far left side is a drop down menu called “Any License.”
* What this means is that some Flickr users share their photos with the public and allow you to use their photos on your personal webpage – IF you give them credit for the photo. The person who took and uploaded the picture owns the copyright for that picture. So, just as you can’t copy someone else’s writing, you can’t use other people’s pictures without giving them credit.
- Select “All creative commons.” This will only show pictures with a Creative Commons license. Any picture without this license cannot be used on your blog or other website. Flickr will narrow down the results so that the only ones showing have the proper license.
Now you can browse through the photo results. Choose one that suits your learning plan and goals here at the Adult Learning Centre.
- Click on the picture to go from the search results page to the page for that picture. Just above the picture, there is a small picture of a magnifying glass that says, “All Sizes.” Click all sizes. Then follow the instructions to download the picture and save it to the Desktop.
- Name the picture using the photographer’s name so you can remember who to credit when you use the photo.
- Keep the web browser window open on the photo page – you will need the web address for the next activity. You will use this picture in the next part of this exercise.
If you plan to post images that are not your own, read this guide to learn more about copyright and how to give people credit for their images.
Image Editing
Picasa
You can upload your photos into albums for safe keeping or sharing and you can edit photos as well. Picasa is an online photo album service that is connected to your Google account. Do have to download software to your computer before you can use it so this should only be done on your home computer.
Learn more about Picasa and try it out here.
Pixlr
You may have seen Photoshop effects on magazine covers or online and thought, ‘I’d like to try that!’ You don’t need to buy special photo editing software like Photoshop to try your creative hand anymore. You can download and use a web application like PIXLR.
If you want to learn how to get creative and crop, change colours, add in a new background or change filters on a photo, start here with a Beginner’s Pixlr Tutorial:
It will require some time to get to know everything that you can do in Pixlr but can be well worth the time spent.
Instagram is a social network that is entirely based around photography. If you enjoy shooting photos or viewing photos shot by others, this is the app for you. You can only use this as an app on a smartphone or other mobile device.
Instagram is good at linking you with other people of shared interests. You probably won’t know everyone who likes your photos or follows you if you have a public account. You can make it private so that only your friends (followers) can see what you post but then you may be missing the point of seeing and sharing photos from around the globe.
- Download the app to your phone or other mobile device
- Create your handle name, enter email and password information.
- Personalize your profile with a picture that will be your icon, a few sentences about you or about what you are taking photos of.
If you want to get fancy with filters and borders and hashtags, learn more in the video below.
Activity 8: Adding a Photo to Your Blog Post
Write a three to five paragraph blog post about photo organizing and editing.
Try to answer these questions in your blog post:
- Why is it important to remember the photographer’s name when you are using photos from Flickr (or other websites) on your own webpage?
- Do you think photo editing and organizing is an important skill for students?
- Thinking about the image you chose from the Flickr activity: Why is this photo representative of your learning or life goals?
- Once you have finished writing your blog post, click the picture icon in the editing bar to upload your edited photo. Use the picture toolbar that appears under the embedded picture in Blogger to put it on the left, middle, or right of the page.
- Make sure you give the owner of the image credit for their work.
Or, click here to return to the main menu for Twenty-First Century Learning.